1.2 About running QW-V2D examples
The following Sections of this User Guide present basic features of the QW-V2D software on a set of examples. In the defaultQW‑V2D installation, the examples are located in the directory:
<PUBLICDIR>\qw_examp\QW_V2D\
The location of PUBLICDIR is defined in Installation.
A major part of this User Guide is concerned with “standard” examples, i.e., such that can be analysed with the basic QW-V2D package. They are placed in a subdirectory:
<PUBLICDIR>\qw_examp\QW_V2D\Standard
For example, if we refer to a project ..\Ant1\ant1.pro, we mean the project found in the default installation at:
<PUBLICDIR>\qw_examp\QW_V2D\Standard\Ant1\ant1.pro.
In the case of custom installation the path should be modified accordingly.
Using QW-V2D with QW-OptimiserPluschapter concerns joint application of QW-V2D with the optional QW-OptimiserPlus module. Examples discussed in that Section are located at:
<PUBLICDIR>\qw_examp\QW_V2D\Opt_Plus
The examples use objects from different QW-3D libraries. In the default QW‑V2D installation, standard libraries are located in subdirectories of the directory:
<INSTALLDIR>\elib
When a library object is added to the project, a full path to the proper library is recorded in the project (and its *pro file). This direction will be used by QW-Editor to re-draw the object when the user modifies the object parameters. In *pro files included in the installation, this full path is reduced to a relative one, so that a project from <PUBLICDIR>\qw_examp on the user’s computer will look for its libraries in <INSTALLDIR>\elib of the same installation. Hence in the installed examples, first modification of their objects proceeds smoothly.
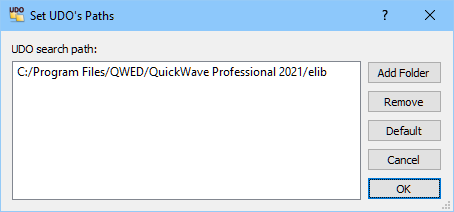
Note that upon any Save command of QW-Editor, full paths to the applied library files will be recorded again. If the user moves *pro files between computers, having different installation directories, or if the original <INSTALLDIR>\elib is uninstalled or re-installed,QW-Editor may be unable to find the file describing the object to be modified. An appropriate error message will appear. In such a case the user can indicate the proper path to the file describing the object using UDO->UDO’s Paths command of the main menu of QW-Editor. This command opens a dialogue window as presented in Fig. 1.7‑1in which the paths to different libraries may be declared. At the next modification of the object the software will be sweeping these paths in search for the *.udo file of the modified object.
Fig. 1.7-1 Dialogue used to set paths to non-standard UDO libraries.
The project *pro files include all information about the project geometry, media, input and output parameters as well as about layouts of QW-Editor windows which were previously open while editing this project.
As regards QW-Simulator displays, layouts of the previously open windows are saved in projectname.en8 file in the project directory (with default settings of Preferences). For most of the examples, the *en8 files are installed in the directories of their respective *pro files. Thus, for example, the first Results window for S-parameters results opened during the simulation of the..\Ant1\ant1.pro example should bring up the window as in Fig. 2.1-2.