2.1 Creating the task file
QProny is an advanced feature of QW-Simulator which can be selected either by inserting suitable commands into *.ta3 file or by selecting an appropriate option in the QW-Editor program.
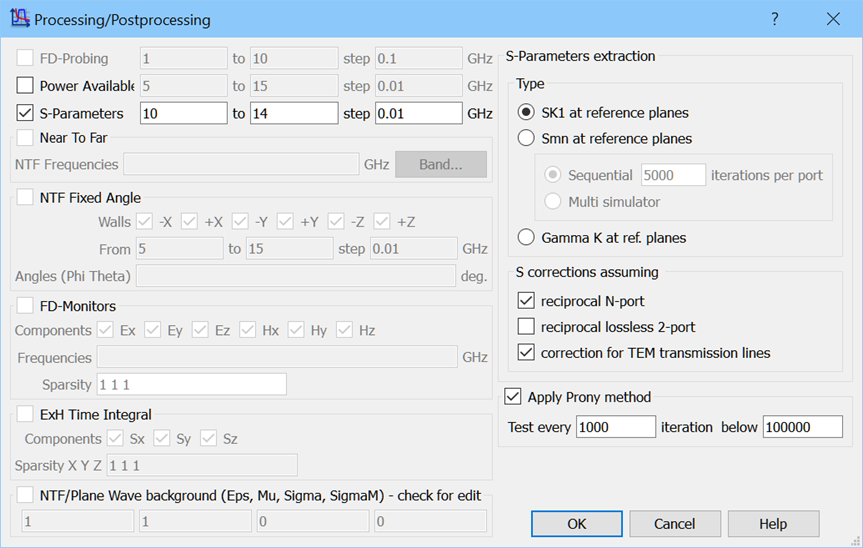
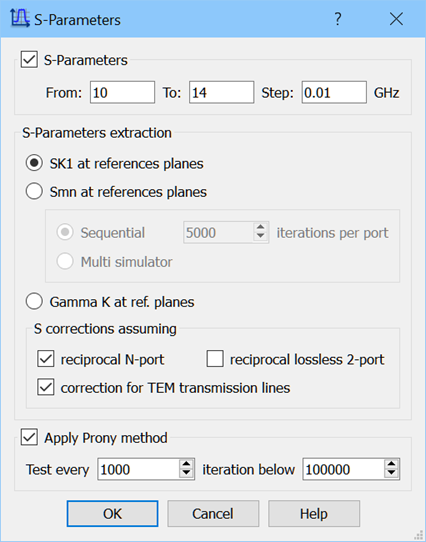
In order to select the QProny option through the QW-Editor, one has to check the Apply Prony method check box in the Processing/Postprocessing or S-Parameters dialogues. This allows specifying basic parameters for the QProny. The dialogues shown in Fig.P 2.3-1 further allows one to select two parameters required by QProny. The first Test every parameter, expressed in the number of iterations, tells the module how often the moving average of signal energy at the circuit ports should be tested. The second iteration below parameter defines the upper iteration limit for this testing. In practice, when the upper limit is reached, the QProny module is deactivated by QW-Simulator and the user cannot build a new model for iterations above this upper limit.
Fig.P 2.3-1 Post processing configuration dialogues with advanced options for QProny module.
If the Apply Prony method option in the Processing/Postprocessing or S-Parameters dialogues is selected, QW-Editor automatically creates a special task file when the project is exported. The task file's name is XXXX_ prony.ta3 where XXXX is the name of the project. Note that standard Export&Run ![]() or Export, Run & Start
or Export, Run & Start ![]() commands of QW-Editor launch QW-Simulator with XXXX.ta3 tasker file. To launch QW‑Simulator with XXXX_ prony.ta3 directly, the Export, Run & Start Prony
commands of QW-Editor launch QW-Simulator with XXXX.ta3 tasker file. To launch QW‑Simulator with XXXX_ prony.ta3 directly, the Export, Run & Start Prony ![]() command should be used.
command should be used.
The content of the file for the project named ex1 is shown in Fig.P 3.1-1. The file can be edited with a text editor. The file contains commands and parameters given in separate lines. The upper block in the file is not related to the Apply Prony method option. In the current version there are three commands that are related to the operation of the QProny module (RunIter, Calculate_With_Prony, Continue) available.
The command RunIter instructs QW-Simulator to run for a specified number of time-steps. It has two parameters. The first parameter is the project name for which the structure has been defined in the *.pro file and templates have been generated. The other parameter is the number of iterations to perform. If RunIter is used with the QProny module, this parameter should be set to 1 in order to obtain the correct phase response.
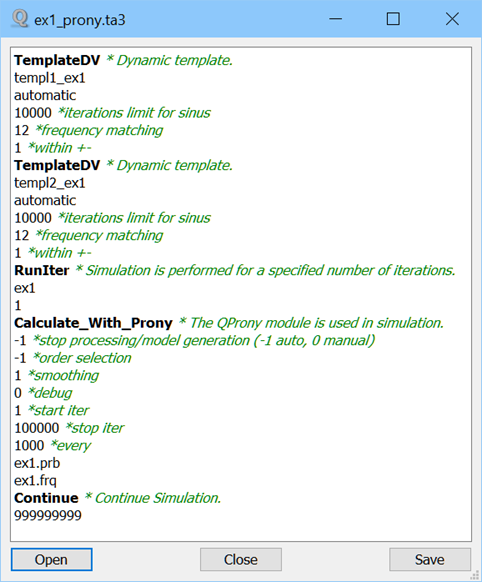
Fig.P 3.1-1 The contents of filter ex1_prony.ta3 file.
The second command, Calculate_With_Prony tells QW-Simulator to invoke the QProny module. The first two parameters of this command define the operation mode of the module. Only the automatic mode is possible so both parameters should be set to -1. The third parameter is a multiplier for the length of the window used in calculating the moving average of signal energy at the circuit's ports. Its value should be proportional to the bandwidth of the source signal. The default value 1 is sufficient for the signals with source bandwidths of approximately 20%. It is recommended to double its value (using an external text editor) for every 20% increase of the source signal bandwidth. The fourth parameter, *debug, should be set to 1 only if the analysis crashes during QProny processing. The next three lines in the XXXX_prony.ta3 file define the first and last iteration for using the QProny module and the frequency of performing the signal energy tests. The last two parameters are the names of the files for storing the signal samples in the binary format (*.prb) and the results of the modelling in the text format (*.frq).
The last command Continue instructs QW-Simulator to continue computations without using QProny, until the upper limit specified in the last line is reached.